
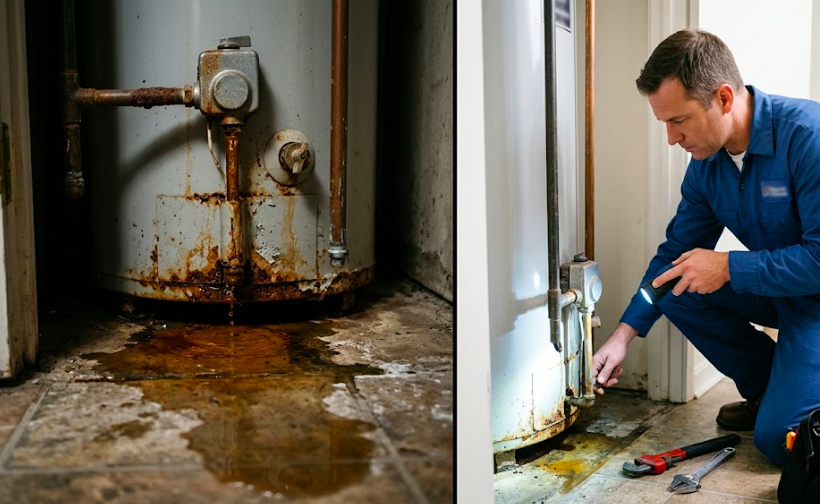
You walked into your utility room, basement, or garage and there it was: a puddle of water sitting right under your water heater. Maybe it’s just a small drip. Maybe it’s spreading across the floor fast. Either way, your stomach dropped.
Here’s the honest truth: a water heater leaking from the bottom is never a wait and see situation. Depending on the cause, you could be looking at anything from a $20 part replacement to a full unit failure or worse, significant structural water damage to your home that costs thousands to remediate.
This guide covers everything you need to know: what’s actually causing the leak, how dangerous it is, what to do immediately, and when you need to call in a professional.
What Does It Mean When Your Water Heater Leaks From the Bottom?
Not all water heater leaks are created equal. A leak from the top usually means inlet/outlet pipe issues. A leak from the side often points to the temperature-pressure (T&P) relief valve. But a leak from the bottom tells a very specific story.
When water is pooling under your water heater, it typically means:
- The tank itself is compromised – internal corrosion or sediment buildup has caused the tank lining to fail
- The drain valve is faulty or partially open – one of the most common (and fixable) causes
- The T&P relief valve is discharging through its drain line – which terminates at the bottom or floor level on many installations
- Condensation – less serious, but can still cause moisture problems over time
The location of the leak bottom of the tank body vs. components at the base is the critical distinction that determines whether you’re looking at a repair or a full replacement.
The 7 Most Common Causes of a Bottom Water Heater Leak
1. Faulty or Loose Drain Valve
The drain valve is located at the very bottom of your water heater. It’s used during routine maintenance to flush sediment from the tank. Over time, this valve can:
- Wear out and fail to seat properly
- Develop mineral buildup that prevents a complete seal
- Be left slightly open after a flush (a surprisingly common mistake)
Good news: A leaking drain valve is usually the best-case scenario replacement valves cost $10–$30 and are straightforward to swap out.
How to check: Look for dripping specifically from the valve spigot itself, not from around the base of the tank.
2. Sediment Buildup Inside the Tank
This is the silent killer of water heaters. Over years of use, minerals from hard water primarily calcium and magnesium settle at the bottom of the tank and form a thick sediment layer. As this sediment continues to build up and heat cycles repeatedly, it:
- Creates hot spots on the tank floor
- Causes the steel to expand and contract unevenly
- Eventually cracks or weakens the tank lining from the inside out
Once the tank itself is cracking due to sediment damage, there is no repair only replacement.
According to the U.S. Department of Energy, flushing your water heater annually is one of the most effective ways to extend its lifespan and maintain efficiency. Skipping this step is the number one reason tanks fail prematurely.
3. Internal Tank Corrosion (Anode Rod Failure)
Every water heater has a sacrificial anode rod typically made of magnesium or aluminum that corrodes instead of the steel tank. When this rod is depleted and never replaced, the tank itself starts corroding.
Rust eats through the tank lining from the inside, eventually creating small pinholes or cracks that allow water to seep out. By the time you see a leak, the corrosion is already advanced.
Signs your anode rod has failed: Rust-colored water from hot taps, metallic smell, or a water heater that’s 8+ years old and has never had the rod inspected.
4. Temperature-Pressure Relief Valve (T&P Valve) Discharge
The T&P relief valve is a safety device that releases water when pressure or temperature inside the tank exceeds safe limits. Its discharge pipe typically runs down the side of the unit and terminates near floor level.
If your T&P valve is:
- Releasing water regularly (even in small amounts)
- Corroded or showing mineral deposits
- More than 6 years old
…it may be activating more than it should, creating pooling near the base. This is also a safety concern a T&P valve that fires repeatedly may indicate dangerously high pressure inside the tank.
5. Loose or Degraded Pipe Fittings at the Base
On some water heater installations, cold water inlet and hot water outlet connections run through or near the base of the unit. If fittings have loosened over time due to thermal expansion/contraction, or if flex connectors have degraded, you can see dripping that appears to come from the bottom.
This is more common in older installations and can usually be addressed by tightening or replacing the fittings but it requires turning off the water supply first.
6. Condensation
This is the least serious cause on this list, but it still warrants attention. In humid climates or during cold months, a cold tank filling with hot water can produce significant condensation on the exterior especially on the bottom and lower sides.
Condensation-related moisture:
- Is usually more diffuse (not a concentrated puddle)
- Appears when the tank refills after heavy hot water use
- Dries on its own once the tank reaches temperature
However, in regions with high ambient humidity, persistent condensation can promote mold growth and rust the floor or platform your heater sits on.
7. Cracked or Damaged Tank Body
The worst-case scenario. If your water heater’s steel tank has developed a crack due to age, sediment damage, thermal stress, or corrosion the unit must be replaced. There is no effective way to repair a cracked water heater tank.
Tanks in this condition often fail suddenly and catastrophically, releasing 40–80+ gallons of water rapidly into your utility space.
How Dangerous Is a Leaking Water Heater?
A leaking water heater isn’t just a plumbing problem. Depending on how long it’s been leaking and the failure mode, you’re dealing with multiple overlapping risks:
Structural Water Damage
Even a slow drip from a drain valve, left unaddressed for weeks or months, can:
- Saturate wood subfloors and cause rot
- Soak into drywall and framing in finished utility rooms
- Damage concrete slabs through repeated moisture cycles
- Ruin stored items in garages, basements, or closets
Mold and Mildew Growth
Standing water and persistently damp materials are mold’s ideal environment. Mold can begin growing within 24–48 hours of water intrusion. Once established, mold remediation can cost $1,000–$10,000+ depending on the extent of spread.
Electrical Hazards
Many water heaters are located near electrical panels, outlets, or wiring runs. Water and electricity are a life-threatening combination. Even a small leak that contacts wiring can create shock hazards or fire risk.
Scalding Burns
If the T&P valve is failing and pressure is building inside the tank, there is a risk of superheated water discharge. This is rare with modern units but should be taken seriously — never ignore a T&P valve that keeps firing.
Catastrophic Tank Failure
An aged, corroded tank under pressure can fail without warning. A full tank rupture can release 50–80 gallons instantly, causing immediate flooding of the surrounding area.
Water Damage Risk: When a Small Leak Becomes a Big Problem
This is the part most homeowners underestimate.
A drip that seems manageable say, a tablespoon of water per hour from a faulty drain valve can deposit over a gallon of water per day onto your floor. Over a week, that’s 7+ gallons. Over a month while you’re “keeping an eye on it”? Over 30 gallons slowly seeping into whatever’s below.
If your water heater sits on a wooden platform, in a finished basement, or in a room adjacent to living space, the hidden water damage can be severe long before you notice warping, staining, or odor.
This is where a water damage restoration team becomes essential. Once moisture has infiltrated building materials subfloor, insulation, drywall it doesn’t dry out on its own fast enough to prevent mold and structural compromise. Professional water extraction, drying, and remediation is the only way to fully address it.
If you’re in the McAllen, TX area and your water heater leak has resulted in standing water, soaked flooring, or wall damage, FloodFix Solutions provides 24/7 emergency water damage restoration services. Their team handles extraction, structural drying, and full remediation fast.
Step-by-Step: What to Do Right Now If Your Water Heater Is Leaking
Don’t panic but do act immediately. Here’s the exact sequence:
Step 1: Turn Off the Cold Water Supply
Locate the cold water shut-off valve on the pipe running into the top of your water heater. Turn it clockwise to close. This stops new water from entering the tank and reduces pressure.
If you can’t locate or reach this valve, turn off the main water supply to your home.
Step 2: Turn Off Power to the Water Heater
- Electric water heater: Go to your breaker panel and flip the breaker labeled for the water heater.
- Gas water heater: Turn the gas valve to the ‘PILOT’ or ‘OFF’ position. Do NOT turn off the gas at the main supply line unless you smell gas.
Important: Never let an electric water heater run without water in the tank the heating elements will burn out.
Step 3: Assess the Leak Source
Once the water supply is off and the unit is powered down, inspect carefully:
- Is the drip coming from the drain valve at the very base?
- Is it seeping from around pipe connections?
- Is it coming from the tank body itself?
- Is the T&P discharge pipe dripping?
This assessment tells you whether a repair is feasible or whether you’re looking at replacement.
Step 4: Contain Standing Water Immediately
Use towels, a wet/dry vac, or a mop to remove standing water as quickly as possible. Every minute water sits on wood, carpet, or drywall increases damage.
Place a bucket under active drips. Open windows or run fans to begin drying the area.
Step 5: Call a Licensed Plumber
Even if you’re handy, a leaking water heater needs professional evaluation. A plumber can:
- Confirm whether repair or replacement is the right call
- Replace a drain valve or T&P valve safely
- Assess anode rod condition
- Properly drain and remove a failed tank
Step 6: Call Water Damage Restoration If Needed
If there is standing water, soaked flooring, wet drywall, or any sign of moisture beyond the immediate drip area call a water damage restoration company. Do not wait. Hidden moisture causes mold and structural damage that grows exponentially with time.
Can You DIY Fix a Bottom Water Heater Leak?
It depends entirely on the cause:
| Cause | DIY Feasible? | Notes |
|---|---|---|
| Loose drain valve | Yes | Tighten with wrench – easy |
| Worn drain valve (replacement) | Yes (with skill) | Requires partial drain, valve replacement |
| T&P valve replacement | Possible | Requires proper sizing and code compliance |
| Pipe fitting tightening | Yes | After shutting off supply |
| Anode rod replacement | Yes (with skill) | Needs full drain, specific socket size |
| Sediment flush | Yes | Preventive; won’t fix existing tank damage |
| Corroded or cracked tank | No | Full replacement only |
| Internal tank failure | No | Full replacement required |
Bottom line: If the leak is from a component (valve, fitting), DIY may be viable with the right tools and confidence. If the leak is from the tank body itself, stop replacement is the only option, and attempting to patch a steel tank under pressure is dangerous.
When to Call a Professional Plumber
Call a plumber immediately when:
- You can’t identify the leak source
- The leak is coming from the tank body (not a valve or fitting)
- Your unit is 10+ years old
- You see rust-colored water or smell rotten eggs from hot taps
- The T&P valve keeps discharging
- The leak worsened after you tried to address it
When it’s too late for repairs:
- Visible rust or corrosion on the tank exterior at floor level
- Multiple failure points simultaneously
- Tank age exceeds 12–15 years
- Cost of repair exceeds 50% of a new unit’s price
According to the Water Quality Association, most conventional tank water heaters have a realistic service life of 8–12 years with proper maintenance, and 6–8 years without. If yours is approaching or past that range, replacement is almost always the smarter financial and safety decision.
How Much Does It Cost to Fix or Replace a Leaking Water Heater?
Here’s a realistic cost breakdown:
Repairs:
| Issue | Estimated Cost |
|---|---|
| Drain valve replacement | $150–$300 (parts + labor) |
| T&P valve replacement | $100–$250 |
| Anode rod replacement | $150–$300 |
| Pipe fitting repair | $75–$200 |
| Sediment flush (professional) | $100–$200 |
Replacement:
| Unit Type | Installed Cost |
|---|---|
| Standard 40-gallon gas | $700–$1,200 |
| Standard 40-gallon electric | $600–$1,000 |
| 50-gallon gas | $900–$1,500 |
| Tankless (gas) | $2,500–$4,500 |
| Tankless (electric) | $1,500–$3,000 |
Prices vary by region and contractor. Always get 2–3 quotes for a full replacement.
Water damage remediation costs: (if the leak caused damage): A small, contained leak caught early may cost $500–$2,000 to address. An undetected leak that has soaked subfloor, framing, or multiple rooms can run $5,000–$25,000+. This reinforces why acting immediately matters.
How to Prevent Future Water Heater Leaks
The best time to prevent a water heater failure is before it happens. Here’s what proactive homeowners do:
1. Flush the Tank Annually
Sediment buildup is the #1 cause of premature tank failure. A once-a-year flush clears mineral deposits and extends unit life by years. This takes about 30–45 minutes and requires only a garden hose.
2. Inspect and Replace the Anode Rod Every 3–5 Years
Pull the rod and check it if it’s less than ½ inch thick or heavily coated with calcium, replace it. This single maintenance step can double your water heater’s lifespan.
3. Test the T&P Valve Annually
Lift the test lever briefly to confirm it opens and reseats properly. If it doesn’t reseat cleanly, or if water keeps dripping after the test, replace the valve.
4. Install a Leak Detection Device
Smart water sensors placed under the unit can alert your phone the moment moisture is detected — often before you’d ever notice. Devices like the Moen Flo or Phyn Plus can also monitor flow patterns and detect slow leaks automatically.
According to the Insurance Information Institute, water damage is one of the most common and costly homeowner insurance claims in the U.S. accounting for nearly $13 billion in insured losses annually. Prevention is far cheaper than remediation.
5. Know Your Unit’s Age
If you don’t know when your water heater was installed, check the serial number most manufacturers encode the manufacture date in the first few characters. A unit over 10 years old deserves close monitoring; one over 15 years old should be budgeted for replacement proactively.
6. Maintain Proper Temperature Settings
The recommended setting is 120°F (49°C). Temperatures above this accelerate mineral scaling, stress the T&P valve, and increase energy consumption. Lower isn’t just safer it extends the life of the tank.
Frequently Asked Questions
Q: My water heater is leaking from the bottom but only a little can I wait?
No. Even a small, slow leak indicates a failure in progress. The source won’t heal itself, and standing moisture even in tiny amounts causes compounding damage over time. Address it within 24 hours.
Q: Should I turn off the water heater if it’s leaking?
Yes, always. Turn off the cold water supply first, then shut off power (electric breaker or gas valve). This stops the tank from continuing to pressurize and fill, reducing leak volume and safety risk.
Q: Is a water heater leaking from the bottom always a replacement situation?
Not always. If the leak is from the drain valve, T&P discharge line, or a pipe fitting these are repairable. If the leak is from the tank body itself, replacement is required. A professional plumber can diagnose this in minutes.
Q: Can a leaking water heater cause mold?
Absolutely. Mold growth begins within 24–48 hours on wet building materials. If your leak has gone unnoticed for days or weeks, assume mold remediation may be needed in addition to the plumbing fix.
Q: How long does a water heater last?
Most conventional tank water heaters last 8–12 years with regular maintenance. Without annual flushing and anode rod inspection, expect the lower end of that range or earlier failure.
Q: What if my floor or walls are wet from the leak?
Don’t assume it’ll dry on its own. Call a water damage restoration professional to assess moisture levels in building materials moisture meters can detect saturation invisible to the naked eye. Early intervention is far cheaper than mold remediation or subfloor replacement later.
Conclusion
A water heater leaking from the bottom is one of those home problems that feels minor but carries outsized risk if ignored. The difference between a $200 drain valve swap and a $15,000 water damage restoration project often comes down to how quickly you act.
To recap:
- Identify the leak source valve, fitting, or tank body
- Shut off water supply and power immediately
- Remove standing water and begin drying
- Call a licensed plumber for repair or replacement assessment
- Call a water damage restoration company if moisture has spread beyond the drip zone
If you’re in the McAllen area and dealing with water damage from a failed water heater or any other plumbing emergency, FloodFix Solutions is available 24/7 for rapid water extraction, structural drying, and full restoration services. Don’t let a plumbing failure turn into a mold and structural damage nightmare.
Also on this site: If your water heater itself needs repair or replacement after a leak, our licensed plumbing team handles emergency water heater repair and installation across the area. Learn more about our water heater repair and replacement services →
Leave a Reply